
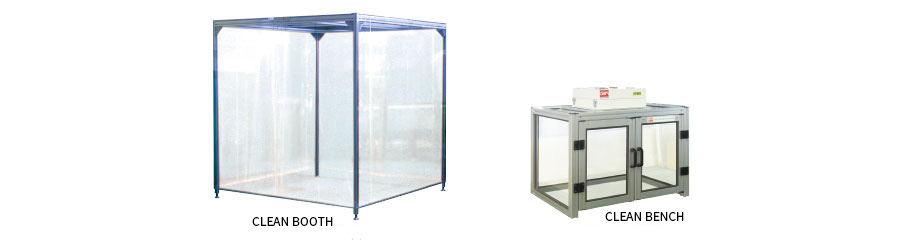
CLEAN BOOTH SYSTEM
Other than standard line-up, we will fabricate a system to meet your desired size and design
Certificates/Approvals
| EU RoHS | China RoHS | TSCA | CE | UL | CSA | PSE |
*No certificates and approvals for this product
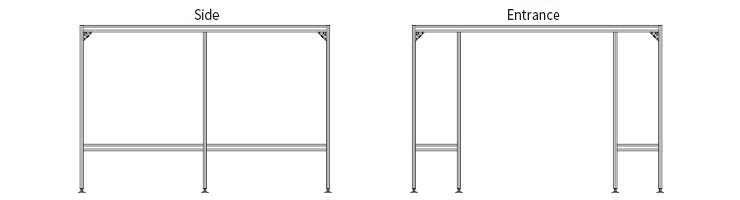
Clean Booth System basic design
The system consists of the following components
Frame
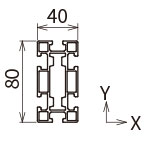
Vertical pillar : F44L(40x40) processed for M16 on one side
Beam : F48L(40x80), F44L
Corner stay (SA40), 8pcs.
End cap (EP44), 4 pcs.
Adjuster foot (AK16) x number of vertical pillars
Frame joint member
Beam : F48L(40x80), F44L
Corner stay (SA40), 8pcs.
End cap (EP44), 4 pcs.
Adjuster foot (AK16) x number of vertical pillars
Frame joint member
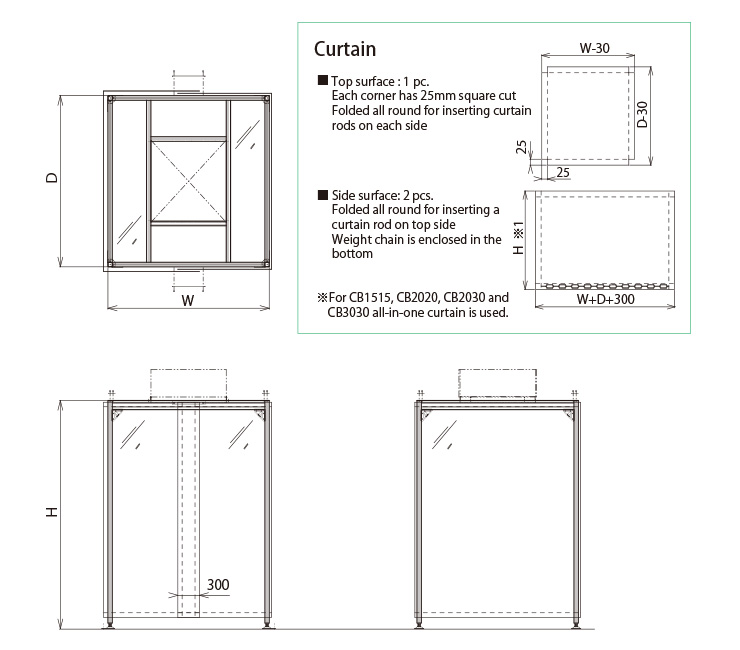
Curtain
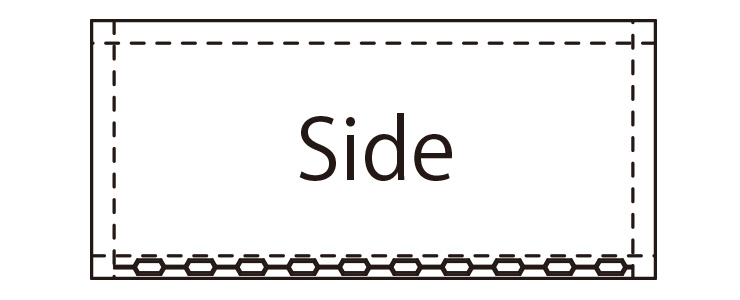
For side surface, 2 pcs.
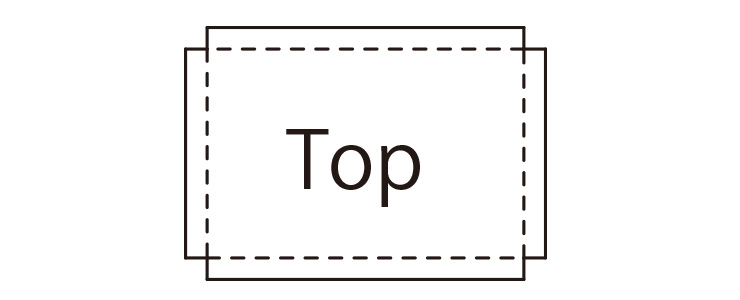
For top surface, 1 pc.
Fixing SUS plate for side surface, 2 pcs.
Fixing SUS plate for top surface, 4 pcs.
M4×10 truss head screw, 12 pcs.
F nut(NF40-M4), 12 pcs.
Aluminum rod Ø6 (for securing curtain)
Sheet retainer
For top surface, 1 pc.
Fixing SUS plate for side surface, 2 pcs.
Fixing SUS plate for top surface, 4 pcs.
M4×10 truss head screw, 12 pcs.
F nut(NF40-M4), 12 pcs.
Aluminum rod Ø6 (for securing curtain)
Sheet retainer
FFU
See "Clean Cube"
Other FFUs are also mountable
Other FFUs are also mountable
Notes
・ Normally a set of curtains comprises two pieces (Overlap width of doorway : 300mm) except for CB1515, CB2020 and CB3030 which curtains are all-in-one type.
・Fix the booth by inserting anchor bolts to the fixing holes of 14mm dia. provided in the adjuster feet.
・The top curtain is not processed for a cut for mounting a FFU. Cut the curtain to fit the FFU on site.
・The gap between the curtain and the ground is from 50mm to 100mm depending on the degree of cleanness.
・Opening dimensions for installation of FFU can be optionally specified. Please consult us.
Curtain data
UV protection or shading type curtains are available on request.
・0.3 mm thick ・Antistatic processed ・Fire proofing class 2 (JIS A-1322) ・Folded on all four sides
・Weight chain enclosed in the bottom (side curtains only) ・Transparent ・Material : Soft vinyl chloride
・0.3 mm thick ・Antistatic processed ・Fire proofing class 2 (JIS A-1322) ・Folded on all four sides
・Weight chain enclosed in the bottom (side curtains only) ・Transparent ・Material : Soft vinyl chloride
Technical data
The following data is based on the condition that the booth is anchored to the ground and the load is static. Take enough safety margin for other conditions.
Allowable load per beam (F48L-Y Free end, centralized load)
Allowable load per beam (F48L-Y Free end, centralized load)
| Length (mm) | Up to 2000 | 2001 to 2999 | 3000 to 4000 |
| Allowable load | 130kg (Max. deflection 6mm) |
90kg (Max. deflection 12mm) |
68kg |
| Reinforcement | Not required | Recommended | Requied |
Reinforcement members are arranged as shown below.
(*Arrangement and the above values change when wheels are used instead of adjuster feet)
(*Arrangement and the above values change when wheels are used instead of adjuster feet)
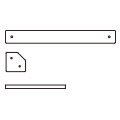
CB0805
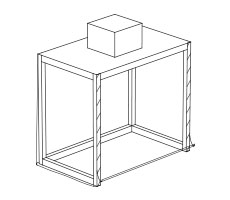
| Dimensions | W800×H700×D500 | |
| Specifications | Top | PET plate |
| Side | Antistatic curtain | |
| Front | Fixed with Velcro tape | |
Dimensional drawing

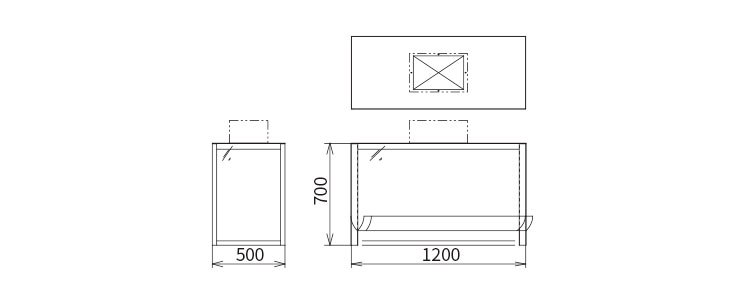
CB1205
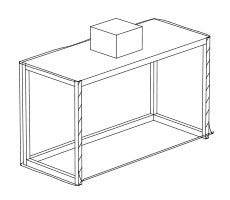
| Dimensions | W1200×H700×D500 | |
| Specifications | Top | PET plate |
| Side | Antistatic curtain | |
| Front | Fixed with Velcro tape | |
Dimensional drawing
CLEAN BOOTH - Standard models
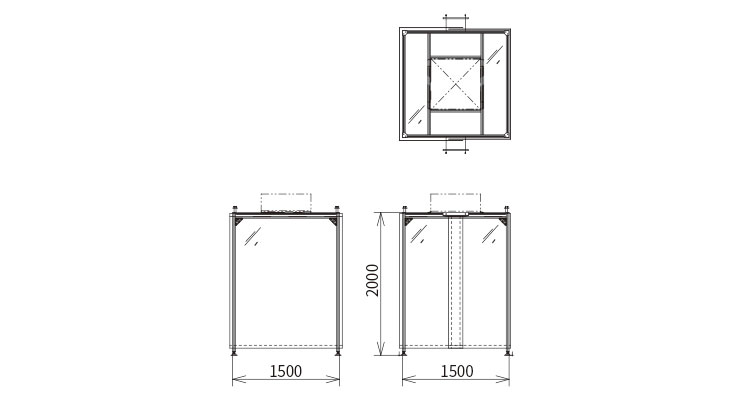
CB1515
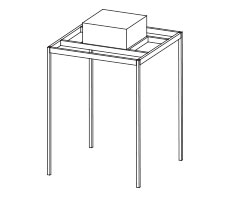
| Dimensions | W1500×H2000×D1500 |
Dimensional drawing
CB2020
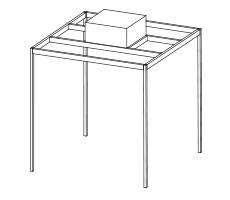
| Dimensions | W2000×H2000×D2000 |
Dimensional drawing

CB2030
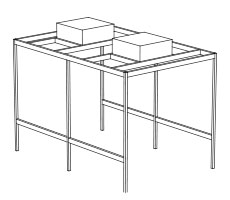
| Dimensions | W2000×H2000×D3000 |
Dimensional drawing
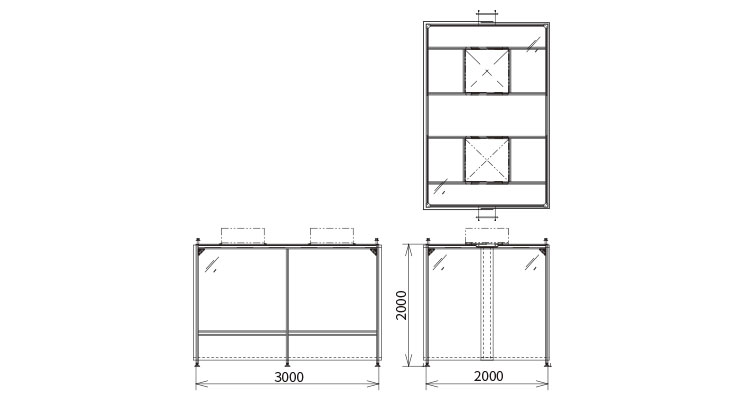
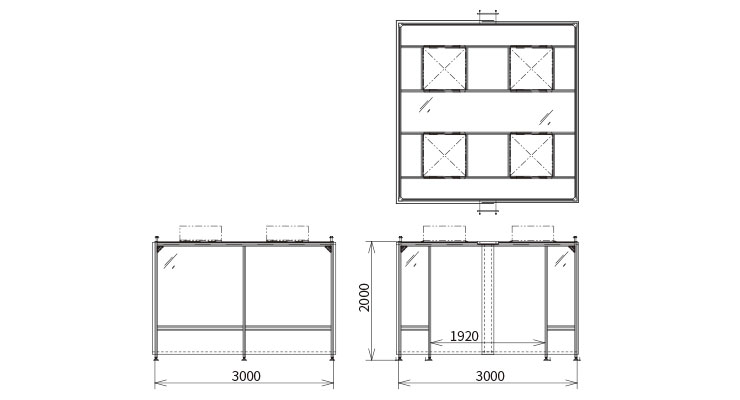
CB3030
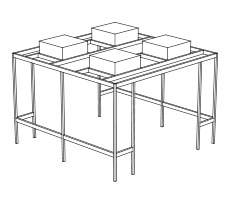
| Dimensions | W3000×H2000×D3000 |
Dimensional drawing
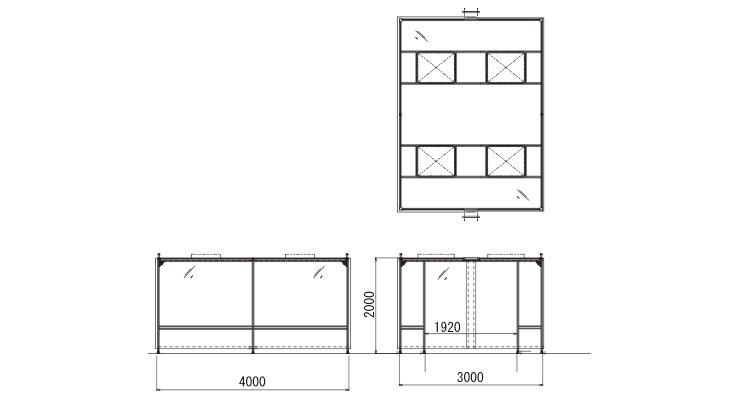
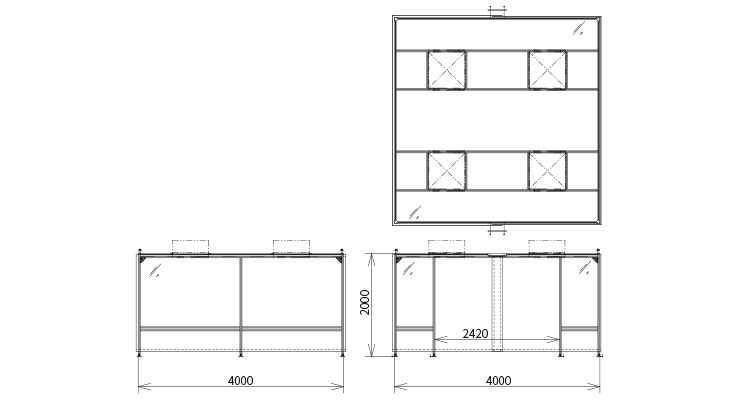
CB3040
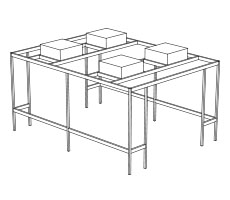
| Dimensions | W3000×H2000×D4000 |
Dimensional drawing
CB4040
| Dimensions | W4000×H2000×D4000 |
Dimensional drawing
*The dimensions of W, H and D are for outer size of the frame.
*Although all components have been cleaned before shipment, clean them again when bringing them into a clean room.
*Do not put other loads than FFUs on the top surface.
*Anchor the booth to the floor after installation.
*Although all components have been cleaned before shipment, clean them again when bringing them into a clean room.
*Do not put other loads than FFUs on the top surface.
*Anchor the booth to the floor after installation.
・Eliminates high-place work to assure worker’s safety.
・FFUs are easily detachable for maintenance
・Installation is easy even where the clearance from the booth top to the ceiling is very low.
・FFUs are easily detachable for maintenance
・Installation is easy even where the clearance from the booth top to the ceiling is very low.
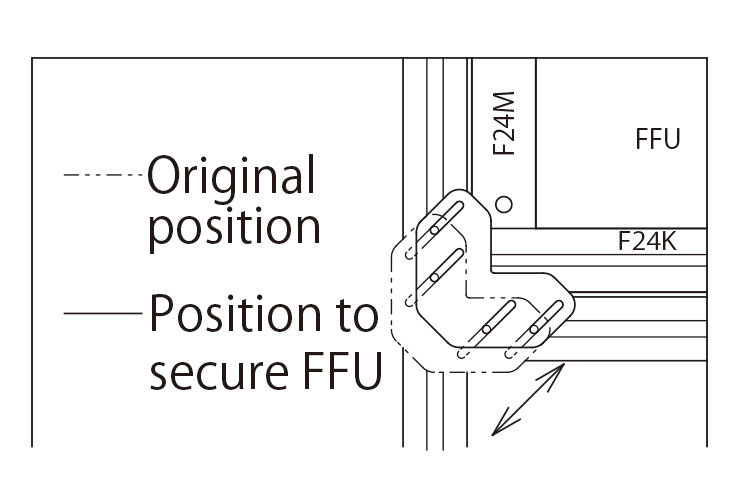
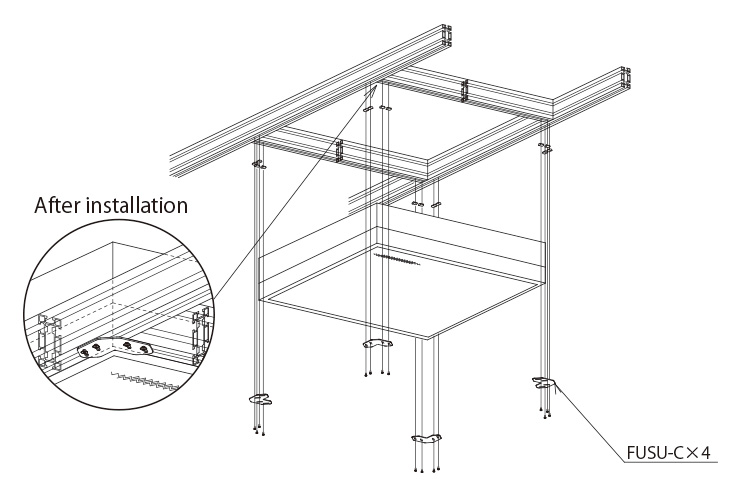
Fill the gaps between the FFU and the frame with the enclosed packing.
Slide the FUSU-C2s to the position.
Put the frame of HEPA filter on the FUSU-C2s.
Slide the FUSU-C2s to the position.
Put the frame of HEPA filter on the FUSU-C2s.
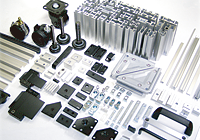
Components of Standard CLEAN BOOTH
Frames, curtains and securing members
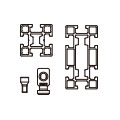
Frame/Coupling parts
Corner stay

Adjuster
End cap
Curtain fixture
Curtain x1
Curtain x2

Adjuster feet can be changed to wheels on request.
Frame assembly
What is LECO Frame?
LECO is an aluminum frame system developed by a machine maker.
It has been designed focusing on man-hour reduction.
Just insert and tighten the frame members to assemble.
LECO Frame offers an optimum solution with its easy and quick assembly work as well as sophisticated appearance.
It has been designed focusing on man-hour reduction.
Just insert and tighten the frame members to assemble.
LECO Frame offers an optimum solution with its easy and quick assembly work as well as sophisticated appearance.

* Aluminum parts are provided by YUKI LABORATORY Co., Ltd.
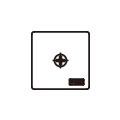
How to joint the frame with T-locks and tapered bolts
The tapered bolt strongly draw in the T-Lock by wedge effect and firmly joints frames each other.
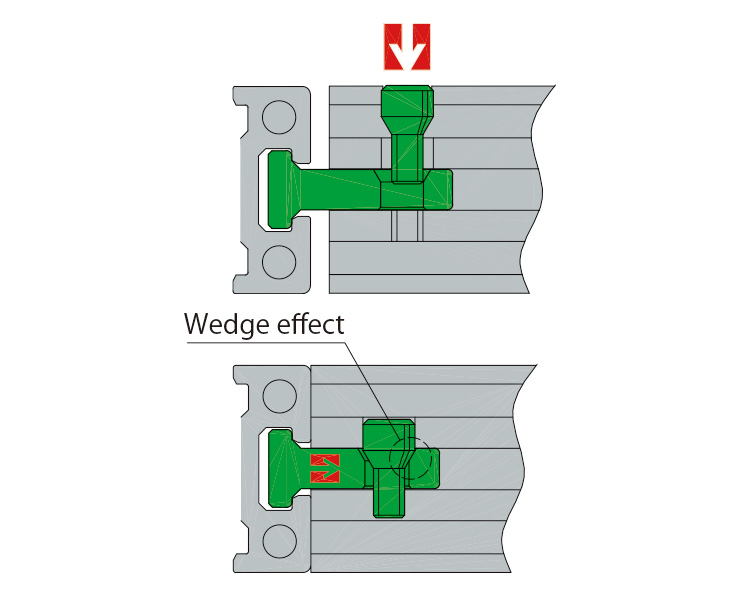
Tighten the taper bolt.
T-Lock is drawn in.

1. Insert the frame.
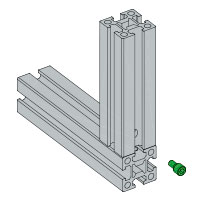
2. Place a tapered bolt.
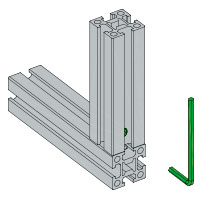
3. Tighten the tapered bolt.
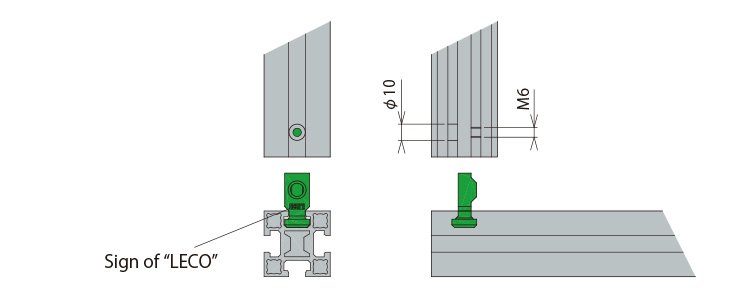
Caution
T-Lock has an orientation. Insert a frame so as the sign of “LECO” faces to Ø 10 side and tighten a tapered bolt.
T-Lock has an orientation. Insert a frame so as the sign of “LECO” faces to Ø 10 side and tighten a tapered bolt.
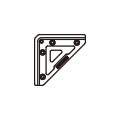
Corner stay
Die-cast corner stay consists of 2 pieces to securely joints frames by wedge effect. This gives excellent rigidity in assembly.

End cap

Lightly hammer the End cap into the frame edge and tighten the enclosed screw. End cap will not easily come off once fitted as the screw pushes out inside the frame.
For prevention of injury, it is recommended to fit an end cap when a frame edge is exposed to outside.
For prevention of injury, it is recommended to fit an end cap when a frame edge is exposed to outside.
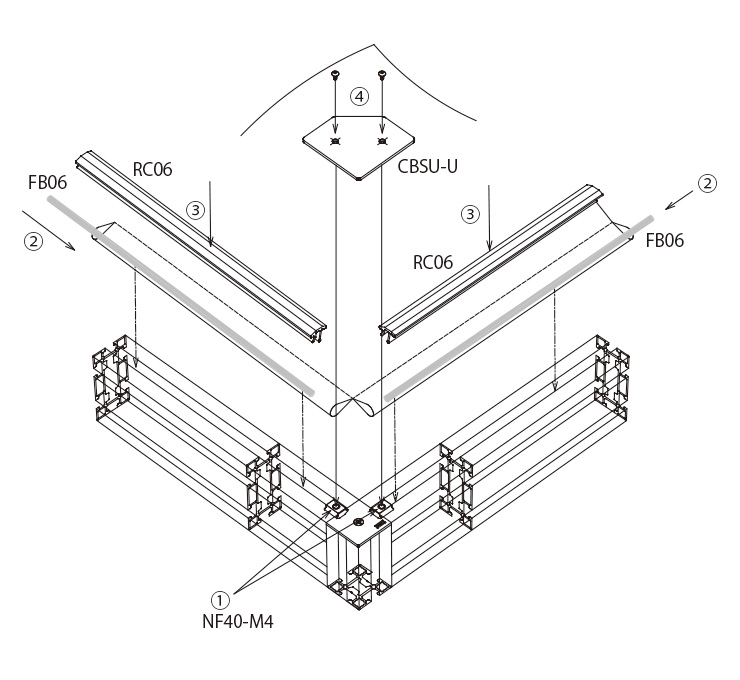
Fitting of curtain
1. Insert two pieces of F-nut NF40-M4 into the four corner of ceiling. Then, insert an aluminum rod FB06 into each pocket of curtain rim on four sides and tuck FB06 with curtain in the groove of frame using a presser bar RC06.
*Place RC06 at 35mm from the ditch end. (See "How to insert RC06")
Fix the each of four corners by fitting a retainer plate CBSU-U.
*Place RC06 at 35mm from the ditch end. (See "How to insert RC06")
Fix the each of four corners by fitting a retainer plate CBSU-U.
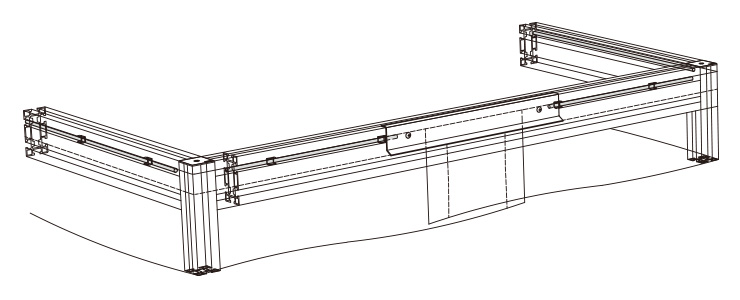
2. Insert a F-nut NF40-M4 in the groove to fit a plate CBSU-DL so as to touch the rubber plate.
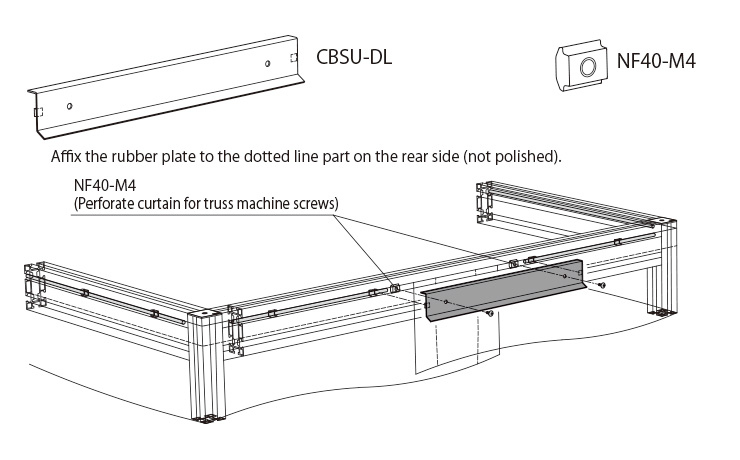
3. Now the FB06 has been fixed with the curtain.
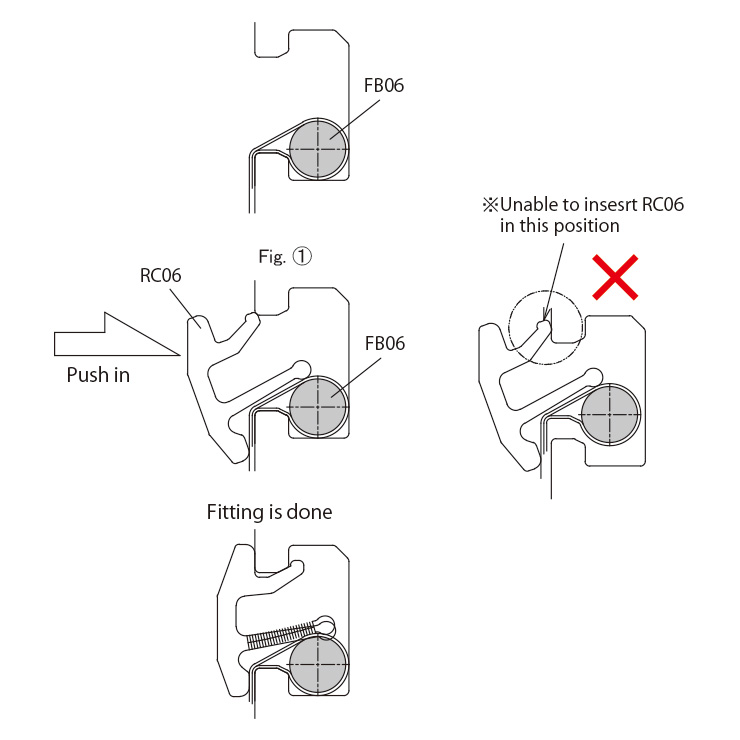
How to insert RC06
Basically, two people are required to do the work.
Push the curtain with the inserted FB06 into the groove.
Place RC06 so as to press down the FB06 by its longer rib.
One person pushes the RC06 in and the other person support the RC06 and the FB06 so as to keep the position illustrated in Fig. ①.
*To push in, the FB06 has to be positioned as illustrated in the Fig. ①.
【When FB06 cannot be easily pushed in】
Gently tap it with a plastic hammer or the like.